Showing posts with label recipe. Show all posts

Monday, August 12, 2013

How Pinterest Saved My Life

Ok, ok, ok...Pinterest didn't save my life literally, but it did figuratively.

You see, a little more than a year ago, one of my long-time best friends, Nick called me and told me he wanted to propose to his girlfriend, Sonia, and he needed my help. Nick, Sonia, Travis and I hang out as a group on a regular basis, so this was super exciting news---and I love to plan stuff, so away we went.

At that point, I was in my 3rd trimester of pregnancy, so Nick and I came up with an idea for the 4 of us to go eat together and then go to a cupcake place where the two of them had first discussed the idea of getting married and sharing a life together. Nick was excited for the plan, so I told him that I would get it all together so she wouldn't suspect.

I called Sonia and told her that I really wanted the 4 of us to have a fun night out as a 'last-hurrah' of sorts before the baby was born. Sonia was all about it, so I asked her what she wanted to do. She offered to come down to where we live, but I insisted that I wanted to go somewhere in her area (we live 30 minutes apart), that we hadn't been to before. We settled on a restaurant that was about a 5 minute walk from the cupcake place where Nick was planning to propose. Sonia told Nick all about our idea and to continue to keep her from catching on, he even faked not wanting to go out that weekend. She 'convinced' him to go so off we went. As we were riding together to dinner, I started talking about how I had been craving cupcakes lately and was too lazy to make any, so I asked if everyone would be okay with going to the cupcake shop near the restaurant after dinner.

Everything went as planned and Nick pulled off a very successful and memorable proposal.


A couple of months later, Sonia asked me to be a bridesmaid to which I happily accepted. :)

There are three bridesmaids: Ruth (Maid of Honor), Sara (Nick's sister) and myself. Ruth lives out of state and told us early on she wouldn't be able to schedule time off from work to make the shower and the wedding, so Sara and I started figuring out plans for the shower a couple of months ago, right around the time my summer vacation started. Sara has been a busy bee this summer, including moving to a different city, working and school, and I was spending most of my days with Nathan and watching shows like Scandal and Orange is the New Black on Netflix, so I started pinning ideas and recipes on Pinterest for the shower that I was interested in doing.

First of all, Pinterest is pretty much the best thing ever for finding recipes and ideas for just about anything, but the downside is that there are SO MANY ideas it gets difficult to pick and choose because you start to feel like, "I NEED ALL THE THINGS!!!!"

We settled on doing a brunch-style shower so that it wouldn't be smack-dab in the middle of someone's day, which is great for the guests, but that doesn't leave much time for preparing the morning of! Sonia's mother offered her house as a venue which I immediately took her up on because her house is a middle-ground for where the guests live.

I told Sara that since she was busy, I just needed her to take care of the games and that I could do mostly everything else and if I needed her for something, I'd let her know. It took me forever, but at the last minute, (as in the day I went to the grocery store to get ingredients for the food) I planned a menu. I wanted to pick things that are crowd-pleasers, so I was definitely inclined to pick classic items.

-Deviled Eggs - A family recipe
-Fruit salad - Cantaloupe, strawberries, blueberries, honeydew melon & grapes
-Pigs-in-a-Blanket - Standard Lil' Smokies wrapped in crescent rolls
-Mini Cinnamon Rolls from Iowa Girl Eats. We added chocolate chips to some of them and it was yummy!
-Sausage Balls - Made by my best friend Kim; her family recipe
-Blueberry Scones from Tastebook that I made previously.
-Powdered Donuts (I bought Hostess...Nick loves them!)
-Bacon Wrapped Egg Muffins from Fat Girl Trapped in a Skinny Body. I found they turned out best when I baked the bacon in the oven until they were about half-way cooked. It was less greasy in the muffin pan.

I also thought about doing little pancake kabobs on hors d'oeuvres picks with a slice of strawberry and a blueberry, but I ended up cutting the idea at the last minute. Sonia's mother also ordered some pinwheel sandwiches as well.

I also decided to have apple juice, orange juice, champagne, water and a coffee bar for beverages.

It took me a while to decide what to have for the cake option. I thought about a cake or cupcakes, and I liked the idea of cupcakes. You don't have to cut and serve them and they played a role in the engagement, so that's what I decided on. Feeling ambitious, I decided to see if I could make and decorate my own cupcakes.

I searched Pinterest for a cream cheese frosting and found one that was absolutely delicious at Anatomy of a Craft. It was really easy to make and so good it was hard to not just eat all of it directly out of the bowl. I grabbed a box of Pillsbury Strawberry cake mix at the Cupcake Decorator Kit by Wilton and got to work. I realized I didn't have the first clue as to how to get the perfect swirl of icing on a cupcake, so I went to Pinterest again where I found an excellent tutorial at Glorious Treats. She even gives an excellent tip on filling your bag with the icing which definitely helped because I've never been able to do that so easily. The final addition to the cupcake was to add a few pale pink pearl sprinkles and voila! They were exactly as I had envisioned and were absolutely delicious.

I entertained the idea of making the cupcakes from scratch, but after giving several people samples, they said they were delicious and suggested I just go with the boxed mix...so I did (the horror!).


With so many things going the right way, I had to focus on decorations. Sonia's engagement ring is a pearl and she LOVES pearls, so I felt like having a really girly shower with pink, pearls and lace would be idyllic. I talked it over with Sara and Sonia and they both loved the idea, so it was time to find ideas to incorporate those elements. On a shopping trip to TJ Maxx and Ross in search of serving dishes for the shower, I found a few picture frames and a candlestick that I knew would go nicely. I wanted to feature some of their engagement photos (which I had the pleasure of taking!), so I picked frames that would compliment the decor of the shower as well as Nick and Sonia's apartment. 


I decided to put the pictures in the entry way of the shower so everyone could see as they signed in. I also had a guestbook made at Walgreens with their favorite engagement pictures and turned it into a guestbook for the shower and for the wedding if they choose. I borrowed the beautiful tablecloth from Travis' grandmother to help tie everything together.

Thanks to Pinterest, I found Shanty-2-Chic, where she shares a template for the whole alphabet, numbers and extra symbols and patterns to print your own banner. Each file loads as a .pdf and they print with the outline of the triangle for you to cut out so they're the same size. It was super easy to do and mine turned out beautifully if I do say so myself!


With the help of a friend, I found directions she had found on Pinterest for how to make tissue paper pomanders at Imperfectly Beautiful. Each one took me about 15 minutes and as you can see, they were a nice pop of color. I definitely plan to make these for Nathan's birthday party next month.

A project I was really excited to do, and one of the first I found was a pearl monogram of the brides' future last name. It's from Martha Stewart's website (of course I found it on Pinterest) and was relatively easy to make. Mine didn't look as pretty as Martha's (shocker, I know), but Sonia really liked it. It won't hang flat against the wall, but doesn't look too bad suspended, so we used it over the dessert table. Maybe it would have been better if I was better at crafting with wire, but alas, I am not.


My final craft was inspired by a Pinterest post that I can't find the origin for but still wanted to do something similar. I wish I would have gotten more detailed pictures of how mine turned out because I was very happy with it, but I got plain wooden letters from Hobby Lobby, painted them pink, added white polka dots and then hot glued them to a white ribbon. I loved how it turned out!


Here a few pictures of the table spread:


The beautiful lace on the table is the mantilla that Sonia wore at her quinceƱera. It was the perfect touch!


I found the banner on Oriental Trading.
The bottles on the right are different flavors of creamer in bottles from IKEA.

I didn't get a pictures of the mini-cinnamon rolls, but they were delicious! Everyone was raving about the food and I admit I was very proud to say that all but 2 items served were homemade (the pinwheels and the powdered donuts).

I don't know if this shower would have been nearly as successful (or creative!) without Pinterest. WHAT DID WE DO BEFORE PINTEREST?! Cookbooks? How archaic! ;)

My mom and husband were incredibly helpful the night before, staying up very late to help me get everything finished and I cannot thank them enough for helping make the shower perfect. Sara did an excellent job with putting a little game together that was easy for the guests and had adorable prizes! I can't believe I didn't snap a picture of them!

When I started planning this shower, I of course wanted to give two of my best friends the perfect shower and I can honestly say it was perfect. Everything came out exactly as I wanted it to. The food was delicious, thanks to Sara and the mothers of Nick and Sonia the house looked beautiful (they helped me decorate the night before.

Giving this shower for Nick and Sonia was so exciting for me. I have known Sonia since I was about 5, though we weren't really more than acquaintances until after she and Nick started dating a few years ago. Nick has been one of my close friends since high school. I am so happy for them both and it was so fun to put this together! :)


Thursday, July 11, 2013

I feel like freakin' Martha Stewart.

Sometimes, I think, "Ok, I can be domestic. I know how to cook (kind of), I can clean (when I feel like it) and I can take care of my child. Sure, no problem.

Then Nathan starts getting into everything and I'm like, "Oh, yeah...about that huge pile of dishes in the sink...I guess they'll wait."

See, I regularly praise mothers in my head that seem to make all of these things possible. If it weren't for my husband, I have no idea how I'd manage to keep our home even remotely manageable, keep the baby happy and have time to wash my hair.

Single parents everywhere, kudos to you. You, my friend, are a rockstar.

So today, I felt like Martha Stewart a little bit. I haven't yet read The Tao of Martha by my favorite author, Jen Lancaster, but I'm sure that's what she felt like when accomplishing little projects.

I need to read this immediately. I love everything Jen writes!
You see, yesterday, I was in Nathan's room and noticed a white spot on the railing of his crib that faces the bedroom door, so I took a closer look and discovered that he has been chewing/gnawing on it in the mornings when he's waiting for me to come get him.

We already have a padded-velcro bumper to put on the long side of the crib to protect it from his teeth, but not for the side, so I was like, "HEY. I CAN SEW! I'LL JUST MAKE ONE!"

Really, it isn't difficult to put together, so I know I can do it. Today, my mom, Nathan and I made a trip to Joann's to find fabric and then stopped for lunch on the way back. The plan was for my mom to come over and help keep Nathan entertained while I started my project, but she got called into work, so that didn't happen. But what would Martha do in that moment? She'd find a new project to embark upon that isn't quite as consuming so she can tend to the wee one, yes?

Nathan was in a pretty good mood when we got home, so I decided to start the blueberry scone recipe I mentioned in my post yesterday. It seemed easy, and it would allow me to stop and tend to Nathan as needed, so I got started.

Recipe:

3 cups Bisquick
2 tbsp sugar (I personally suggest doubling that. Keep reading for my explanation)
1 cup frozen or fresh blueberries
2 eggs
1/4 milk

Glaze topping:
1 egg (beaten)
2 tbsp sugar

Preheat the oven to 400.

The first step is to mix the Bisquick and the 2tbsp of sugar together, then add the blueberries and stir.

After eating these scones, I actually think you could double the sugar. My sister-in-law and I also discussed adding a little vanilla or even cinnamon to give extra flavor. I'm trying that next time.


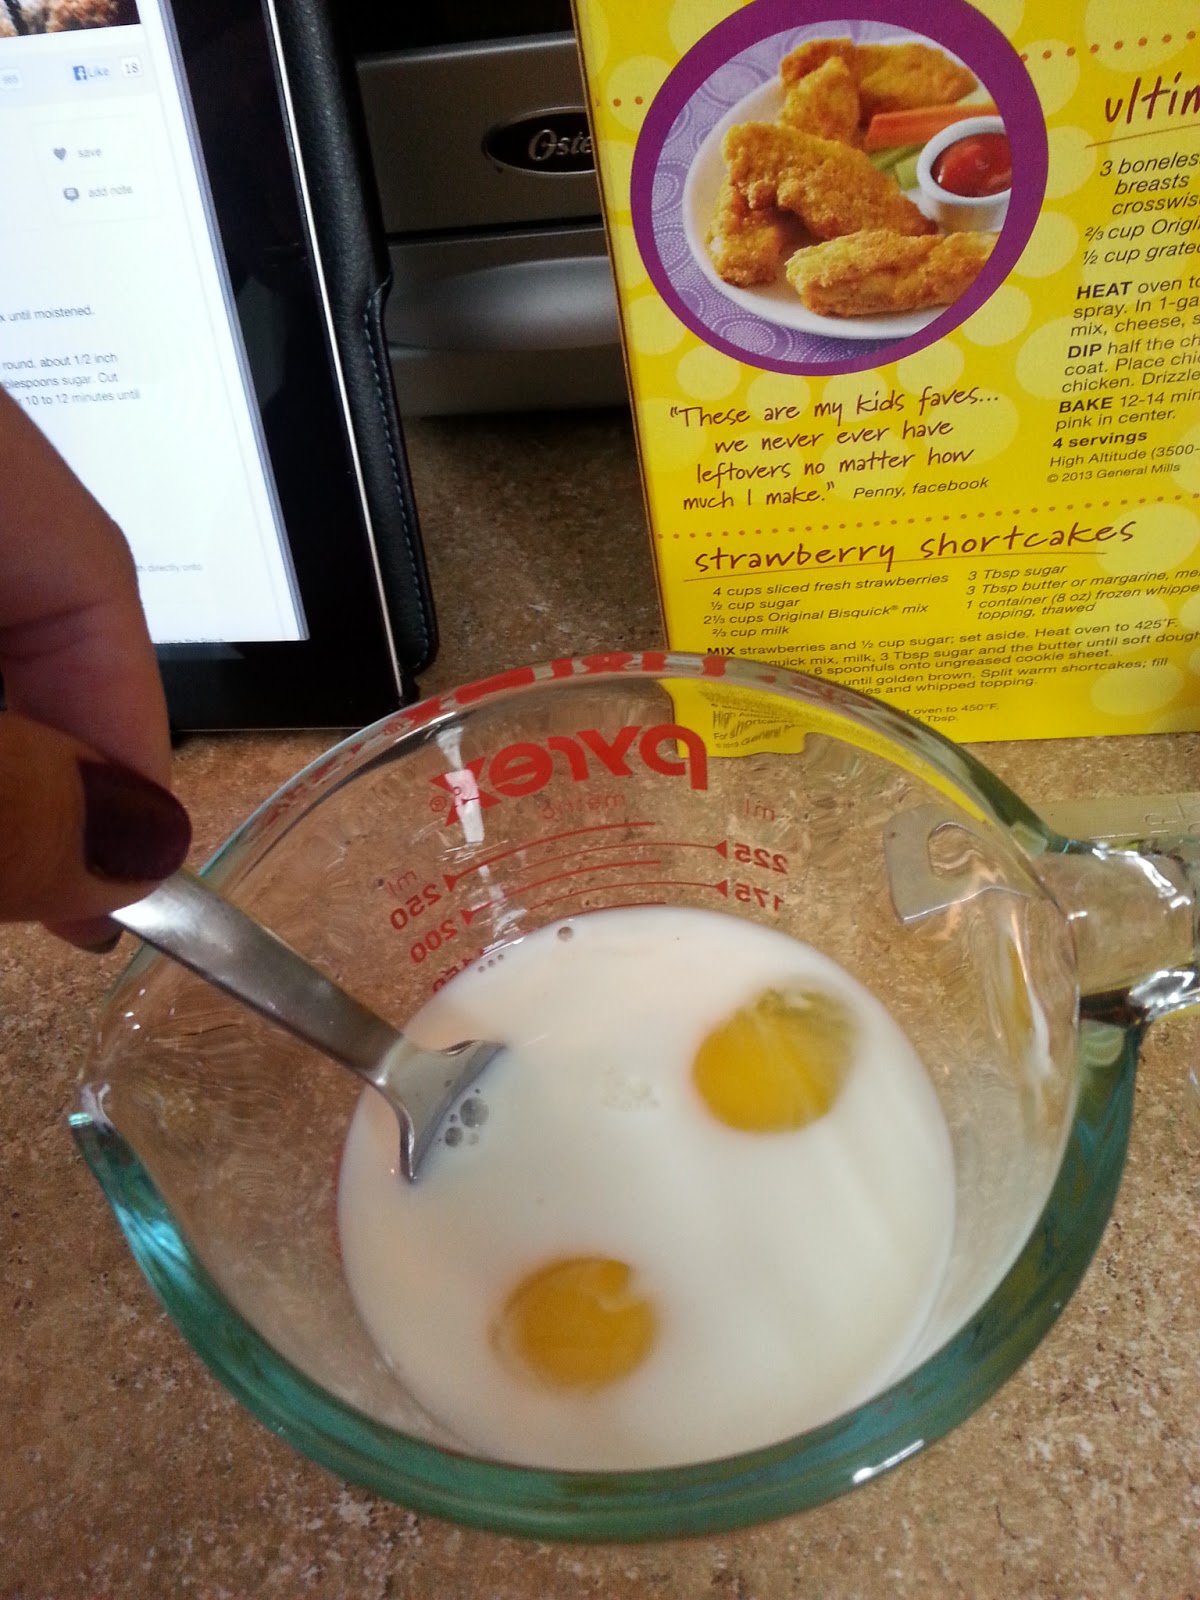
Next, in a separate bowl (or if you're lazy like me, in the measuring cup, add 2 eggs to your milk and beat them.

Add the milk/egg mixture to your mixing bowl of other yummies and mix it up until it a crumbly dough. This is the part where I didn't really know what just how 'crumbly' is the right amount of crumbly. I didn't want to smash the blueberries, and the dough gets thick quickly, but just mix it until the Bisquick is moistened and most of it is kind of together.


And this is the point when Nathan started fussing. Then I remembered that he didn't get a full lunch when we went to lunch earlier and that he was probably hungry, so being the excellent mother I am, I propped him up with pillows, gave him his bottle and put Baby McDonald on the TV. I'm sure even Martha had do resort to this at times. Or she hired a nanny. Judge away, super-moms. My kid is happy.

He even has his own remote! He was actually shockingly happy there!

This is the point in the recipe where I stopped and read the directions about a million times and I'm still not sure I'm right, but they were good, so I don't care. This time, instead of channeling Martha and doing everything by the instructions, I channeled my talented (and brave!) sister-in-law, The Hazzardous Housewife and decided to make my own instructions.

It says in the directions to, "Turn the dough onto a lightly floured work surface and pat into a 9" round, about 1/2" thick pan."

Well, I don't know what "turn" in baking-land means, but I took that as dump it out onto your floured surface. I didn't want to put it on the counter, so I floured a cookie sheet.

Now, by "pat into a 9" round, about 1/2" thick pan" I'm thinking it should go INTO a pan. Like, a cake pan, but then a I read ahead and it talks about laying it onto an ungreased cookie sheet.

Then I was really confused. So they want me to put this dough into a round pan and dirty it just so I can throw it onto a cookie sheet? That's ridiculous.

What I think they mean is pat it to that size, so that's what I did, as seen below.

Look at that round dough. I'm talented and I don't need pans.
AIN'T NOBODY GOT TIME FO' DAT!

Up next is the glaze. Take an egg and beat it thoroughly. Then get a little brush (or I'm assuming your fingers would work fine, assuming they're clean and you don't mind the raw egg all over your hands) and brush (or rub) the egg all over the top of the dough.
Raw eggs always make me think of Gaston from Beauty and the Beast.
"When I was a lad I ate 4 dozen eggs every morning to help me get large..."

Brush mode.

Ta-da!
 Once you've got it covered in the egg (which you won't likely use the entire egg, unless you're making it egg-stra eggalicious), you're going to use 2 tbsp of sugar and sprinkle the top.

This is where I decided to break away from Martha and channel Alissa (or Rachael Ray since she doesn't measure) and I was like, "Pffft...just 2 tbsp? WHATEVA, I'LL DO WHAT I WANT!"

So I just grabbed some sugar and sprinkled it. It was probably wasn't much more than 2 tbsp. I mean, I'm not trying to get diabetes or anything.

The next instruction is to cut it. I know, cut it before you cook? But yes. The dough is thick enough to keep the cuts, and I think it's because the scones are crumbly after they're cooked, so this gives a clean cut. It said to do it in 12 slices, but I missed that and did 8. My pieces were huge, so go ahead and be a Martha on that one, unless you REALLY like scones.


Bake at 400 for 10-12 minutes or until golden brown. It took mine about 16 minutes. After about 2 minutes in the oven, the whole house smelled soooooo good.
I broke the rules and it still looked yummy!

The next instruction was to serve it immediately with butter or jam, but I was taking it to my in-law's house, and I'm testing the recipe for a bridal shower, so was also curious to see if it was tasty cool, so I looked in my cabinet to see if I had something cuter than a cookie sheet to transport it in that wasn't my huge cake platter with a lid. Then I found this 9"-ish dish that was given to me a few months ago as a hand-me-down and I was like, "OMG, it'll fit perfectly!!! Yay!!!" and then I attempted a smooth transfer...and better yet, I succeeded the transfer flawlessly thanks to a fish spatula and a really wide spatula I bought at IKEA many years ago. I felt like Martha Stewart, Jen Lancaster and Alissa were all sending me happy good luck vibes at that moment because the scones fit perfectly in that dish and it looked and smelled amazing.


Everyone enjoyed the scones and I must say, they were pretty tasty. I will definitely be serving them at the shower I'm hosting next month. I think I'll try to form the dough into a square and cut the pieces into squares since that's a nice finger-friendly option.

After the scones, I threw together a salad and a batch of green bean casserole to take to dinner as well and managed to make it to my in-laws' house with my husband and child on time.

The domestic gods are on my side today in the world of cooking and childcare. Now if they'll add housework into the mix, I'll be all set...though maybe they should also give me some blessings in regard to sewing tomorrow. We'll see if I post about my success or failure.


Friday, July 30, 2010

Happy Friday!

I decided that since Travis, my family and I enjoyed those rolls from the other night so much, I'd share the recipe, since I have 3 people that read my blog, and I'm sure it'll make me FAMOUS!!!!!!!!

Or not, but you know, whatever.


In case you're wondering what on earth Texas Roadhouse is, as I mentioned before, it's a chain of restaurants owned by Willie Nelson. The first one was in Indiana or something like that, and people here in Texas always say, "WELL WHY IS IT CALLED TEXAS ROADHOUSE?!?!!?!1?!!!!?"

Well, friend, that's because it was meant to be like a Texas roadhouse. Duh.

Anyway, it's delicious.


Texas Road House Rolls


Ingredients:
•3 c. all-purpose flour
•2 (1/4 oz.) active dry yeast
•1 tsp salt
•2 tbsp sugar
•1 c. milk + 1/4 c. water, warmed
•1 large egg slightly beaten
•1/4 c. butter + 2 T butter, melted

Instructions:
  1. Place 2 cups flour in a large bowl. Add yeast, salt, and sugar.
  2. In another bowl (I used a large glass measuring cup), combine water, milk, and egg. Stir.
  3. Make a well in center of dry ingredients; pour milk mixture into the well.
  4. Mix by hand, approx 150 strokes, frequently scraping bottom and sides of bowl.
  5. Add 1/4c. melted butter & stir to incorporate.
  6. Add remaining flour, 1/3 cup at a time, and stir after each addition.
  7. Cover bowl with plastic wrap. Set dough in a warm, draft free place such as an oven with a pan of the hottest tap water on the rack below.
  8. Allow batter to rise until double in bulk, about 1 hour.
  9. Coat 12 cup muffin pan with butter, shortening, or spray. Make sure to do this liberally.
  10. Punch down batter with spoon. Dough will be VERY sticky. I’d recommend not using your hands. I sprayed down two rubber spatula-spoons with non-stick spray.
  11. Drop by spoonfuls into muffin tins. Keep in mind rolls should double in size. Brush rolls with 1 tbsp. of melted butter.
  12. Let rise for another 30 minutes in a warm place; rolls should double in size.
  13. Bake rolls on middle rack for 16-18 minutes at 400 degrees. After removing rolls, brush top with remaining melted butter.

Personal note: I made these in the muffin pan, and I believe that next time, I will try to put them on a flat pan in small rectangular-ish shapes, lined up next to each other. I think they may bake better this way.
Cinnamon Butter

•1 stick real butter (softened)
•4 tsp. cinnamon
•1/4 cup brown sugar
•1/4 cup white sugar

Beat ingredients together until smooth. Cover and refrigerate.

Personal note: When I was making the cinnamon butter, I doubled the recipe since I was having a large number of people over. I beat it for quite some time with my stand mixer, and it was REALLY dark in color and quite grainy in texture. I added another stick of butter and that helped a little, but it was still grainy. I decided to add a small splash of milk, (maybe 2-3 tbsp) and it helped a little. Had I not been in a time crunch, I probably would have played with it more.

I suggest for a single batch using 1/8cup of the sugars, (that's 2 tbsp if you don't have a 1/8 measuring cup), mix it and taste. If it's not sweet enough, I would gradually add some of each maybe a tbsp or even a tsp at a time.

I would also suggest beating the butter by itself first to give it a good, whipped texture. Whipped butter speads so well on warm rolls.

So there's my Friday gift to you. Let me know how it turns out! :)

Ok, quickly, I would like to add that I am so excited for the events in my life today. Travis's cousin is in the Navy and was able to get his leave a little earlier than planned to make it to a family wedding that we have tomorrow. The whole family is greeting him today, and we are just super excited to be a part of it. I'm even more excited because his aunt asked me to take pictures of it all, so that she can have pictures to remember the moment. To me, that's a special opportunity and I can't wait. :)